Hi Everyone!
I'm back again to share this easy Christmas Ornament DIY. These take very little time and turn out really beautifully.
All you need is some patterned paper (I used this paper stack), string (I used green baker's twine), glue, and scissors. I used my Silhouette Cameo to cut the ornament shape, but you can hand cut the shape or use a circle cutter. I just happened to like this particular shape, it really doesn't matter - circles, hearts, stars - whatever you feel like cutting up! You need 5 different pieces of patterend paper, cut in the same shape. Essentially, you fold each piece in half and glue them together.
I followed this tutorial by Lori Whitlock and voila! A beautiful Christmas ornament to keep or gift!
*please ignore the last remnants of my paint splatter manicure - it's coming off before this post goes live, I swear!
Check out my other DIYs over at MixedMethod! Have fun crafting, and Happy Holidays!!
Showing posts with label Kim's Posts. Show all posts
Tuesday, December 4, 2012
Monday, October 1, 2012
Easy Instagram Wall Art
Here's an easy DIY wall art idea for making use of your favorite instagram photos!
What you will need:
Start by cutting out your 4" x 4" printouts of your instagram photos. Next, apply a thin layer of Modge Podge onto your canvas, place the photo onto the canvas, and paint another thin layer of Modge Podge on top of the photo. You want to keep your layers thin to avoid warping the paper or creating bubbles. Once thoroughly dry, hang 'em on your wall!
Have fun, and check out some other easy DIY's over at mixedmethod or follow me on instagram @kimberlymelissa! :)
What you will need:
- 4" x 4" canvas
- Color prints (on regular copier paper) of your favorite instagram photos (4" x 4" each)
- Scissors
- Modge Podge (I used the matte finish)
- Paint brush
Start by cutting out your 4" x 4" printouts of your instagram photos. Next, apply a thin layer of Modge Podge onto your canvas, place the photo onto the canvas, and paint another thin layer of Modge Podge on top of the photo. You want to keep your layers thin to avoid warping the paper or creating bubbles. Once thoroughly dry, hang 'em on your wall!
Have fun, and check out some other easy DIY's over at mixedmethod or follow me on instagram @kimberlymelissa! :)
Saturday, August 18, 2012
Inspiration: Origami
Hi again! Kim here! Today I thought I'd share some images and crafts that have inspired me this week. Hopefully you'll be inspired, too! With resources like Pinterest and Instagram, and tons of great crafty blogs at my fingertips, lately I've been piling up all sorts of inspirational photographs and projects. My list of DIY's grows longer and longer by the day. Here are a few great things I saw this week that got me thinkin' about foldin' some paper. I'm seriously thinking about making some origami roses to brighten up my desk at work!
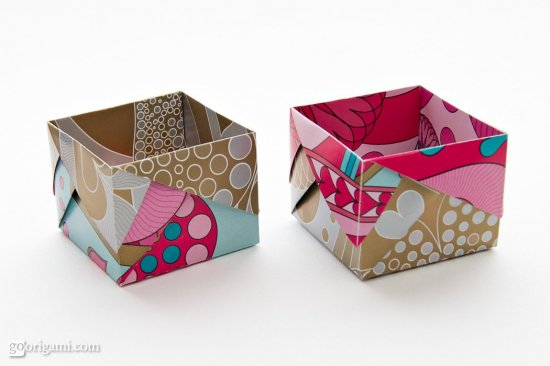
1.// How cool are these origami clothes? Article found at Dezeen magazine. 2.// Origami Roses from bloomize. 3.// Origami Hana Rope Nexklace in Seafoam Green from Homako's etsy shop. 4.// Origami gift boxes from GoOrigami.5.// Origami Pendant from Origami Jewelry.
Check out MixedMethod for a themed inspiration post every Sunday!
Thanks for Reading!
Wednesday, July 25, 2012
Guest Post: A Midweek Manicure from MixedMethod
Hi! I'm Kimberly, author of the MixedMethod blog! Over there I share recipes, DIY projects, and a once-weekly nail art feature. On Sundays I round-up a bunch of fun DIYs from around the interwebz and share them with my readers. Today on On the Side after Five, I'd like to share with you this week's Midweek Manicure = Triangle Triangles:
For this manicure, I used scotch tape to tape off the triangles to achieve a crisp edge. I first painted a base color of Sally Hansen Xtreme Wear in Mellow Yellow over my clear base coat. Because I used tape, I let the yellow dry for over an hour just to make sure I wouldnt have any problems with the tape - sometimes it's best to use tape on day-old polish. Also, stick the tape on your skin a few times to make it a bit less sticky before taping off your nails. After taping off the sides of each nail and creating a triangle in the middle, I painted on 10 Professional Nail Laquer in the color Moonlight. After that was pretty dry, I pulled off the tape and added a top coat. Voila!
If you like this mani, check out my blog - and check back here, too! I'll be contributing a few times a month!
For this manicure, I used scotch tape to tape off the triangles to achieve a crisp edge. I first painted a base color of Sally Hansen Xtreme Wear in Mellow Yellow over my clear base coat. Because I used tape, I let the yellow dry for over an hour just to make sure I wouldnt have any problems with the tape - sometimes it's best to use tape on day-old polish. Also, stick the tape on your skin a few times to make it a bit less sticky before taping off your nails. After taping off the sides of each nail and creating a triangle in the middle, I painted on 10 Professional Nail Laquer in the color Moonlight. After that was pretty dry, I pulled off the tape and added a top coat. Voila!
If you like this mani, check out my blog - and check back here, too! I'll be contributing a few times a month!
Happy Wednesday!
Subscribe to:
Posts (Atom)