Monday, November 12, 2012

Don't feel like baking this holiday season? What about making candy? (sort of)

A few Christmases ago I "made" some peppermint chocolate candy for a special someone. Unfortunately, I don't seem to have any pictures.

I bought a few cheap molds, special chocolate for the molds, red and white sugar, and peppermint oil. I sprinkled the sugar into the the molds. Then, I melted the chocolate using a double boiler. I stirred in a small amount of peppermint oil. I finished by pouring the melted chocolate into the molds. And voila! Once it hardens you have yummy candy you can just pop out of the molds.

Here are some cool videos from YouTube which describe the process in more detail and show some cool designs. You can buy the supplies at craft stores like Joann's. Here are some Wilton products that are pretty easy to find: Candy Melts, Candy Molds, and Candy Tools.

There are, of course, many more sophisticated ways to go either on your own or with kits. Check out the Alpine Pal Candy Pretzel Pops from Wilton (pictured below).

http://www.wilton.com/idea/Alpine-Pal-Candy-Pretzel-Pops


Sweet Eating and Melting, 

Lael

Thursday, November 8, 2012

Book making!

I love taking photographs. Even more, I love turning those photographs into art that I can view. What's the point of having lots of really great photographs if you don't hang them on the wall or view them often? 

I really enjoy making photograph albums or books. Whether for a client or myself, they are a super fun and a great way to view photographs and last for years! With the holidays around the corner, they are also a very thoughtful gift for friends and family. There are book and album templates designed for just about any type of photograph (whether from your phone, a scanned image or a digital camera) and they come in all different shapes and sizes! Also, you can customized them with any text or embellishments that you want!

I use a more complicated program to design photograph albums, but there are plenty of easy to use, quality book making companies out there for everyone to use! In this post, I'd like to highlight a few.
On a side note: I've made books on Picaboo and iphoto and recommend both. Picaboo allows for ALOT of customization, which is awesome!

Picaboo
Picaboo is great because it has an easy to use online book creation station. It saves your progress on their site, so you can work on a product as much as you'd like over time. They offer lots templates etc. for easy creation -- but also allow you to completely customize using your own ideas.


Mac iPhoto
iPhoto books are created on MACs (sorry PC users) in the iPhoto program. Again, these are easy to create with an autofill feature if you want to work super quickly. They also have the ability to customize to some extent. There aren't quite as many templates but the ones the offer are quality and and well designed.
Mpix
Mpix offers great products in general. They are going to be even pricier than the two choices above, but are well worth it if you have the funds. Lots of templates to choose from!

Shutterfly

Printstagram (for Instagram photographs)
These little books would be perfect presents. They are the most inexpensive of the book outlets included in this post. But think of the possibility! The minibook is only $12 and comes with 50 photographs spiral bound (think brag book). The tiny books are 3 for $10. Stocking stuffer?!
There are more outlets out there for transforming your photographs into product, but these are good choices. If you try them out, let me know!

Steph

Tuesday, November 6, 2012

Sketching for Your Vote...

Something a bit different today, but it's arty because I drew it. ;-)


Thursday, November 1, 2012

Tetris Twist

In honor of Halloween, I have a few wonderful pumpkins to share with you. These pumpkins are unlike anything I've ever seen before! Enjoy!


Also, saw this Tetris pumpkin the other day and thought it was super neat! Check it out. 


I know Halloween is over, but I fully plan on celebrating Halloween and Thanksgiving completely. I am not rushing to get to Christmas (unlike most retail spaces). 

Tuesday, October 30, 2012

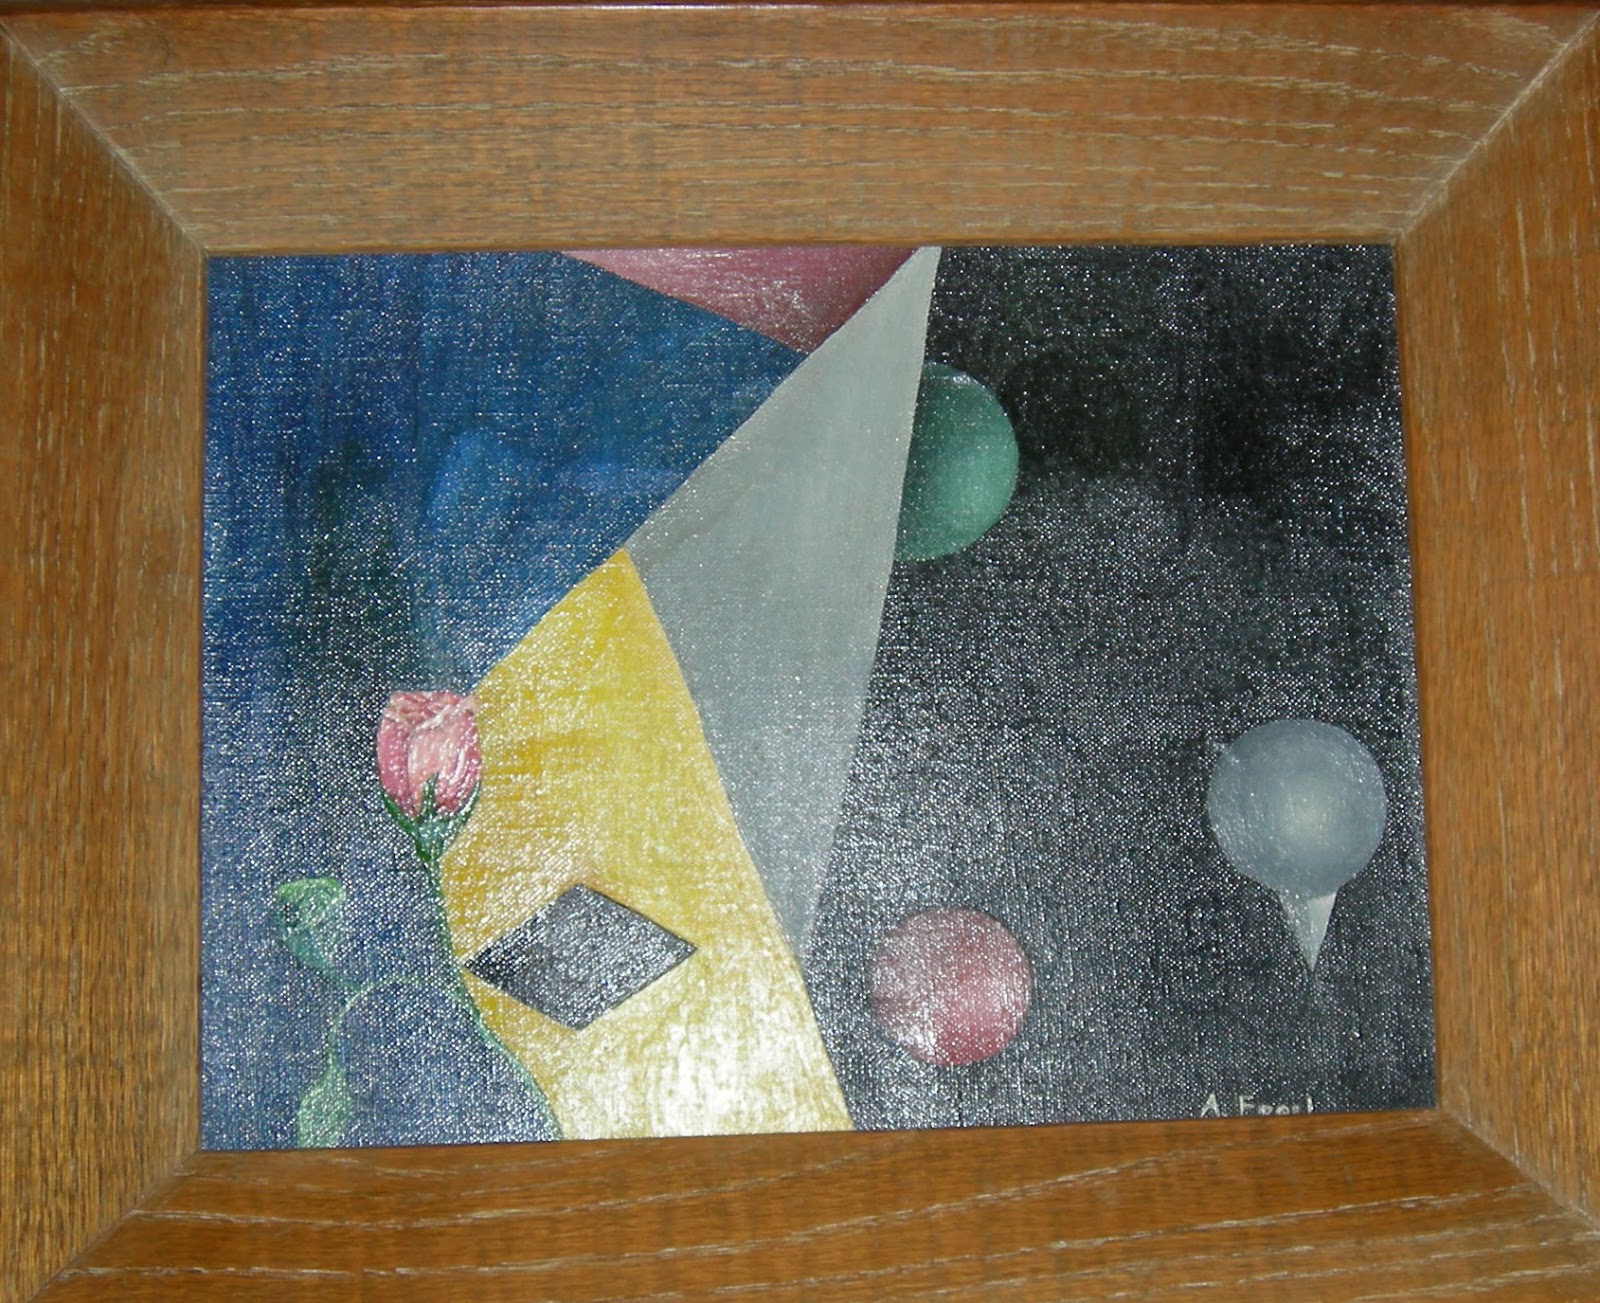
Hurricane and Painting

Howdy from Hurricane Sandy! Survived the storm with just a leaky roof. Not much text for you today, but here are some photos I took of a painting my grandmother painted! I really like it. Some with flash and some without to show color/texture variations. Makes me want to do a work on canvas...

--Lael


Thursday, October 25, 2012

Quick Halloween Costume Ideas!

Are you all ready for Halloween? Have a pumpkin? Spooky decorations? A few spider rings? A giant bubbling cauldron? A few parties to attend? How about a costume?

You don't have one yet? Well, no fear, here are a few fast and cute homemade Halloween costume ideas for you to try!


I'll list the supplies and leave the rest to your imagination! They are pretty self explanatory!

Autumn Leaves Costume
  • Brown Hooded Sweatshirt 
  • Silk Leaves
  • Safety Pins
Basket Full Of Laundry Costume
  • Old Laundry Basket
  • Clothesline (or any rope)
  • Clothes
  • Clothespins and/or Safety Pins
Gold Digger
How to: Gather all the gold jewelry you own—rings, necklaces, bracelets, earrings—and put it on; the more outlandish, the better. Stick to gold or metallic clothing and shoes, and give your hair a golden spritz. To complete this look, head to the garage and borrow a (lightweight) shovel to carry around with you all night.

How to: Gather all the gold jewelry you own—rings, necklaces, bracelets, earrings—and put it on; the more outlandish, the better. Stick to gold or metallic clothing and shoes, and give your hair a golden spritz. To complete this look, head to the garage and borrow a (lightweight) shovel to carry around with you all night.

Time Flies
How to: Loop a long piece of string or rope (something sturdy enough to hold the object’s weight) through the back of the clock. Wear it like a necklace around your neck and attach a pair of costume wings to your back.

How to: Loop a long piece of string or rope (something sturdy enough to hold the object’s weight) through the back of the clock. Wear it like a necklace around your neck and attach a pair of costume wings to your back.

Self-Portrait
How to: Use a frame that’s large enough to showcase you, the painting, from the bust up. For a classical look, tie your hair back into a low ponytail or bun and wear ruffles or a cameo around your neck. Sign your name on a mailing label or plain white sticker and adhere to the top left corner of your shirt, so it peeks out from the bottom of the frame and looks like the artist’s “signature.”

How to: Use a frame that’s large enough to showcase you, the painting, from the bust up. For a classical look, tie your hair back into a low ponytail or bun and wear ruffles or a cameo around your neck. Sign your name on a mailing label or plain white sticker and adhere to the top left corner of your shirt, so it peeks out from the bottom of the frame and looks like the artist’s “signature.”

Iron Chef
How to: Buy a white chef’s hat and tie an apron around your waist. If the apron has pockets, tuck a ladle, spatula, and pasta server inside. Carry a clothing iron around with you all night long.

How to: Buy a white chef’s hat and tie an apron around your waist. If the apron has pockets, tuck a ladle, spatula, and pasta server inside. Carry a clothing iron around with you all night long.

Here are some more fun ideas:
  • Wrap yourself in a roll of orange felt. Cut armholes and put an orange ski cap on your head. Go as a carrot stick.

  • Safety-pin a bunch of cheap watches and costume jewelry on the inside of your coat. Go as a con man.
  • Get a large box and paint it white, green or tan. Make a hole at the top for your head and armholes. Glue on some magnets and some post-it notes with shopping lists and phone numbers. Go as a refrigerator.

  • Get a roll of orange yarn and a few bags of roasted pumpkin seeds. Glue them all over a cheap orange sweat suit. Go as pumpkin guts.

  • Throw a white sheet over your head, and cut a hole for your head to come through. Wear a yellow hat and paint your face yellow with make up. Go as a fried egg.
  • Dress like a mailman. Get a stuffed dog and sew it's mouth to your pant leg.
  • Get a box and paint it white. Make holes for your head and arms. Paint or draw black spots on it and go as a die. If you have a partner, make two and go as a pair of dice.
Check out these websites for some more ideas:


Have a fun and safe halloween!

Monday, October 22, 2012

Weeknight Beading Project


Howdy, Jewelry Lovers! Remember this bead below from an earlier post? I went on about how you can make a quick necklace with one large bead, string, and a clasp.


Although I liked this necklace, the bead turned out to be too heavy for the thin string, so when I went back to Bedazzled, I bought some more beads to make a fuller  necklace and transformed it into this.


Here are the supplies I used: small pliers for beading, scissors, Bedazzled Tortoise Mix Matte Czech 6 seed beads, assorted Bedazzled specialty beads, Bedazzled antique copper lobster clasps with split rings, Bedazzled Natural antique copper clamshell bead tips, Silk No. 10 by Griffin, and a coaster!


I like this string, especially for a quick project or for someone who doesn't bead often and is low on funds/supplies. This string comes with a beading needle for the use of the string. Normally, I don't use bead tips, but after my last collapse (and running down a hallway after my large bead), I decided to use them this time. First, I tied a knot on the end of the string without the needle.


Next, I put the knot inside the bead tip and used the pliers to close it tightly. I then attached the lobster claw to the other side of the bead tip and used my pliers again.


I liked most of the seed beads in this mix, but did not want to use the dark purples, so I separated those and set the ones I wanted to use on the coaster. The coaster helped separate, but also made it easier to string the beads. Good enough until I have more beading supplies!


I think it is probably best practice to set out your beads first, but I decided the basic layout mentally, and felt that the end product would have a more fun and relaxed vibe if the seed bead colors were random rather than in a set order. I started with 20 seed beads. Then one of my smaller specialty beads (I started with 6 of those). Then 10 seed beads. Then another specialty bead and so on.


I placed the large specialty bead in the center of the necklace and repeated my pattern all the way around. At the end, I cut the string, made another knot, attached another bead tip, and finally attached the ring for the lobster claw.


My end result is a bit jazzier than my original single bead vision, but still quick, easy, and fun to make! It's always nice to have done something productive after 9pm on a weeknight!

Until next time,
Lael

PS. Here's another necklace I made after I wrote this post! The lighting was bad, but you get the idea!